 This is a picture of the dining room table that I just completed made from reclaimed wood. Mostly 2x4s, some 1x4s, 1x5s etc. Poplar, fir, cedar, hemlock, plywood, doug fir, pinewood, and probably something else I don’t know the name of. Eight ft long, 33 inches wide, 30 inches high. I altered the design to my own specifications based on a blueprint from http://www.instructables.com/id/Scrap-Table/ . I put this beast together in my pal Chad’s (mostly) remodeled garage using his power tools and occasional sound advice and guidance.

 Freshly planed reclaimed lumber some of which is from a now defunct sixty-year old house as well as a long gone 100-year old house. (Thanks, Chad!)
 Injured thumb from timber falling from the garage loft and me not ready to catch it.
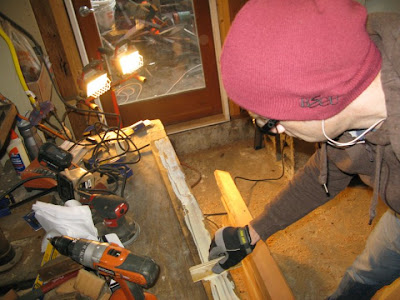
 First screw. Cheese-ball smile still intact.
 Completed trestles and legs.
 Lamination process no. 1: glue.
 Lamination process no. 3: screw.
 Lamination process no. 2: clamp.
 Lamination process no. 4: drill.
 Lamination process repeat ad nauseum.
 Threaded metal rods to keep table from bowing.
 First meal on (partial) table.

The two table sections almost ready to be put together (in sepia!).
 It actually turned out to be a super pain to attach the two sections together. The design is a little inexact and my abilities are more than a little inept. Chad and I worked on it like crazy almost giving up entirely several times out of frustration.
 Tie-down ratchet straps really helped getting it all to come together.
 Rods through the legs
 Sawing the uneven edges off at the ends with a jigsaw was a bad idea (thanks, Chad!). In his defense, however, he meant to say Sawzall, not jig saw.
 Uneven end about to be cut.
 The circular saw/Sawzall combo sort of worked.
 Second time trimming the ends, this time with a 7 1/4" circular saw (not pictured).
 Table in its raw state.
 Pre-drilled holes side end caps added.
 I learned how to use a hand plane!
 I learned how hard it is using a hand plane…
 One half planed. I gave up on using a hand plane exclusively and borrowed an electric hand planer. It really helped getting the table to a sort of flatish resembling surface. But also scraped the hell out of the wood.
 Surface filled in with wood putty.
 Surface sanded ready for polyurethane finish.
 Work table/mess I made.
 Shiny!
 Moving it in to our townhouse was nearly impossible.
 Sam, Chad, and I couldn’t move it all the way up the stairs by ourselves. Our best educated guess is that it weighs somewhere around a billion, zillion tons.
 The table got jammed in the hallway too heavy for the three of us to maneuver. There was even talk of cutting off the legs…and me seriously considering hari-kari. Called Toby to help us out. While we waited stuck half way up the stairs Carey drove over and picked up Toby. Here he is saving the day.
 Days later, these are some of the wall scrape marks (all filled-in ) from cramming the table through the hallway to get it into the dining room.
 Here I am unhappy with the finished product…I did a weak job when I initially planed it. Same with the filling in of holes, cracks, and lines. The surface was not only wavy, but jagged in places where one piece was higher or lower then the one right next to it creating sudden valleys. I couldn't run my mouse over it without it getting stuck. Unacceptable.
 I decided to make it right. This is the partitioned off dining room in order to re-plane, re-fill, and refinish without filling the house with saw dust etc. Also, ET is in there.
 Planed again, sanded again, and partially wood puttied…almost up to my mediocre standards.
 Freshly stained legs.
 First coating of polyurethane (for the second time).
 Voila! A dining room table that revels in its many (seriously, many, many, many) imperfections!


